Learning how to recover deleted files is as important as knowing how to save them. The importance of file recovery in today’s dynamic world cuts across all spheres of life.
With PC and gadgets coming with so much storage space, one needs have a solid and high-capacity external storage media for backing up his most important document and files.
The problem of losing important files to accidental deletion, damaged hard disk drive (HDD) and faulty storage media such as pen drive and memory card has given rise to the popularity of cloud storage services, partition recovery software and file recovery tools.
Our tool for this tutorial is a light-weighted file recovery software from Wondershare. It lets you recover deleted files with ease both on Mac and Windows operating system (OS).
Before going into the tutorial proper, I’ll like to point out some basic routines and best get data back practices to attempt before settling to go for a file recovery tool.
How to Recover Deleted Files on PC without a Software
If you are having having a hard time locating a recently deleted file, document, media and/or archives, there are some orthodox methods to use before settling for a file recovery tool.
You can start by checking out the recycled bin (as advised by MS Tech), file history, earlier back-ups and previous versions of the directory using in-built Windows tools.
Inspect the Recycle Bin
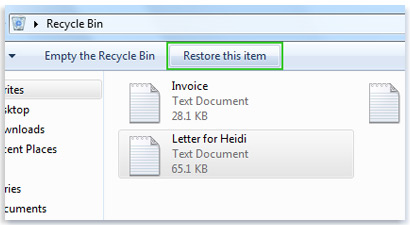
It is normal to check for accidentally deleted files in the recycle bin except when deleted permanently by the use of Shift + Delete operation.
The method employed when trying to recover a deleted file from the recycle bin is quite easy, all you need do is read the following steps carefully.
- Double-click on the Recycle Bin icon on the Desktop to open it. A window will open displaying all files and folders within the Recycle Bin.
- Select the file or document you want to restore by clicking on it.
- Right-click on the selected item and tap “Restore” from the pop-up menu that opens. You can also use the Restore this item that appears on the toolbar to restore the file (if you choose not to use the right-click option)
- Deselect all files and click on Restore all items to restore every other files in the recycle bin.
Use the File History Tool in Windows 10
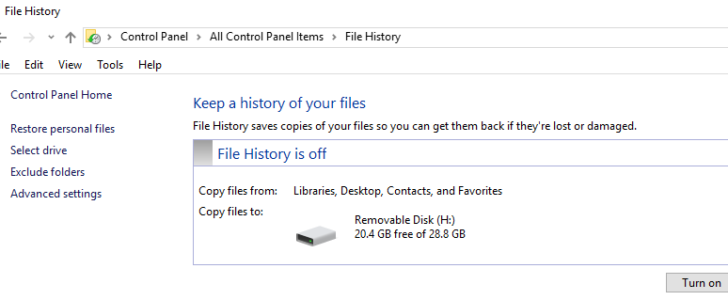
Microsoft windows versions from 8 and above does come with the file history utility tool that lets you automate file recovery and backup. It lets you get access to an improved get data back feature that makes it easy to restore files to the last saved version.
If file history is enabled for your system, you can recover deleted files by following these easy steps carefully:-
- Launch the start screen by pressing the windows logo button on your keyboard.
- type file history in the search box and select Restore Your Files with File History in the result screen.
- Select the files or folder versions you want to restore from file history window and use the Restore button to recover them. Remember not to select the Restore button until you must have selected the specific file(s) you want in order to prevent it from restoring all the all files at once.

- If you know the exact folder where the deleted file was stored, you can navigate to the folder and click on the History button on the ribbon to browse backup copies of files that were once stored in it.
Attempt Recovering it from the File’s Previous Versions
Windows 7 and earlier versions of Microsoft windows operating system does have the file’s previous version feature that’s similar to file history in Windows eight and ten.
Normally, a file’s previous version is the file’s copy that Windows automatically saves as part of a System Restore point.
Recovering a deleted file with this tool is quite similar to that of file history discussed above, all you need do is walk round the following steps:-
- Go to Start -> Computer (or my computer for Windows XP and lower).
- Locate the folder that’s containing the files or document initially. Directly navigate to that folder rather than trying to work with the entire library.
- Right-click on the folder and click on “Restore previous versions” from the pop-up menu that opens. This is also applicable to files stored on the uppermost directory level, i.e directly saved on the drive for example, C:\. In such case, right click on the drive itself and then click on “Restore previous versions”.
- A list of all available versions of that folder will be shown including Windows backup versions as well as System Restore points. Select the version you wish to restore and double-click on it.
- Drag the folder you want to restore to the location where you want to place it (the Desktop or another folder maybe).
Engage Earlier Backups
You can Recover Deleted Files from earlier windows backup, backups to external storage media and/or backups in the cloud.
If the lost data is backed up externally, you can easily regain them from the backup on the storage devices. If backed up to the cloud, the steps to recover them is discussed in the next heading while backups done using Windows backup can be recovered by following these steps:-
- Connect the drives on which the backup is stored to your PC.
- Go to Start -> Control Panel -> System and Maintenance and click on Backup and Restore.
- Click on “Restore my files” and then follow the instructions to complete the process.
Recovering Deleted Files from the Cloud
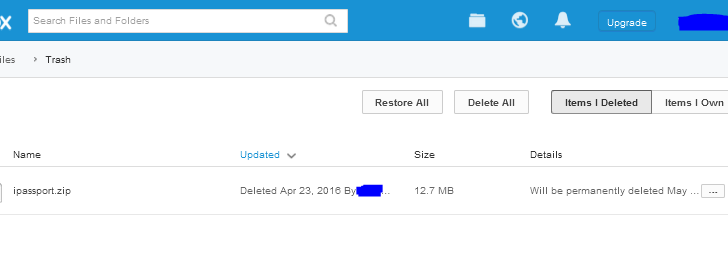
As discussed above, you can recover deleted files from the cloud if they have been synchronized with your device or saved regularly on the cloud storage platform of choice.
Most popular cloud storage apps such as dropbox, Apple’s iCloud, Microsoft OneDrive and Box app lets you get access to deleted files for a chosen duration before they are completely trashed.
The method to use when attempting to recover deleted files depends on the platform your files are saved on, but then, the same rule would normally apply to them in most cases. Remember that this feature works best when the cloud storage app is synced with your computer or internet-enabled device.
How to Recover Deleted Files from Dropbox
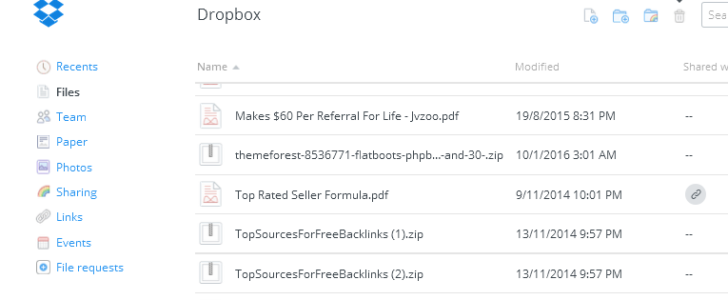
- Visit dropbox homepage by pointing your browser to dropbox.com.
- Enter your access details and hit the enter button to log in.
- Locate the trash can icon by the top right corner, beside the search bar and click on it.
- Locate the deleted file from there and use the Restore option to undelete it.
How to Recover Deleted Files from Microsoft OneDrive
- Visit onedrive homepage by pointing your browser to onedrive.live.com.
- Enter your access details and hit the enter button to log in.
- Locate the recycle bin from the left navigation menu options and click on it.
- Locate the deleted file from there and use the Restore option to recover it.
How to Recover Deleted Files from Box App
- Visit Box homepage by pointing your browser to app.box.com.
- Enter your access details and hit the enter button to log in.
- From the top left window, locate All Files and click on the arrow-down button beside it.
- Locate the trash button from the pop-up window and click on it.
- Locate the deleted files from there and check the box beside a file to undelete it or use the Restore All button atop to undelete multiple files.
N/B: You can recover deleted files from any other cloud service by using the three methods shown above as a guidance.
How to Recover Deleted Files on Windows or Mac with Wondershare File Recovery Software
If employing the simple-to-do methods above hits a brick-wall and fails to recover your files, there is the option of using computer utility apps that are designed for data recovery purposes to get back your important files.
For this tutorial, we will be making use of Wondershare data recovery software.
Wondershare data recovery app works flawlessly on Mac and Windows and uses superior tech to restore most of your files without damaging them.
Here’s a guide on how to recover deleted files with the help of Wondershare file recovery tool on windows or Mac operating system (OS).
To use the software, you will need to first, download the latest version for your operating system type from wondershare.com, and then follow the tutorials below to recover your lost files with it.
On Windows
STEP1: Launch the Wondershare File Recovery Tool:
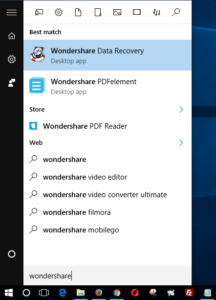
From the active desktop, find the icon labelled Wondershare data recovery (usually denoted with a hard disk drive inside a ribbon), double click on it to launch the program.
You can also open the application by typing Wondershare in the start screen and selecting Wondershare data recovery from the search result.
STEP 2: Pick the Standard or Wizard Recovery Mode:
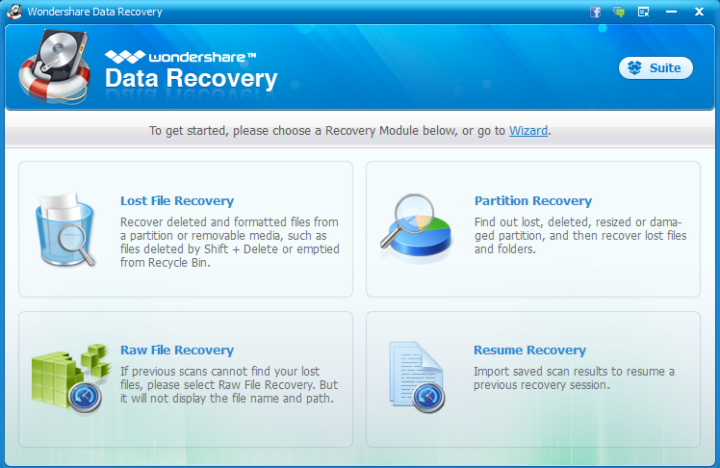
This is fairly easy to do, for most persons, the wizard recovery mode is just perfect, else, you can toggle between standard and wizard recovery mode by clicking the link provided below the active window.
To use the wizard mode, you just need to hit the next button from the active screen, else, switch to the standard mode and select a recovery module (for advance users) of choice.
STEP 3: Select the type of files you wish to recover:

Here, you can specify the type of file you are attempting to get back in order to speed up the file recovery process or select the all files option to attempt recovering all lost files.
Normally, selecting the specific file type would be faster than attempting to recover all deleted documents or data.
STEP 4: Pick the Drive that Housed the Lost Files:

This is the part where you are asked to select the storage device that housed the deleted document or files. It is necessary to connect any external storage media you are attempting to recover a file from before this step.
Here, you can select a specified location, pen drive, flash disk, memory card (connected via a memory card reader), external hard disk drive, system folders, recycle bin and other possible locations.
STEP 5: Select other File Recovery Methodology, Scan and Save the Recovered Files:

Here, you are required to select deep scan if the files were lost as a result of formatting the drive without doing a proper backup or raw file recovery if the files have been lost for a very long time.
The two options can be ignored if the files you are attempting to get back was recently deleted. Click the start button after picking a recovery method based on the explanation above and preview the files based on their types.
The file types can then be recovered separately from the preview window or recovered all at once, by saving them to another storage media other than the one you are attempting to recover the files from.
On Mac
The steps to take when attempting to recover a lost document or file from a Mac PC with the award-winning Wondershare data recovery software is quite similar to the steps outlined above.
But for the sake of emphasis, we are going to run through it once again, but without the screen shot.
Once the software has been installed and activated, every other thing about it becomes very easy as it was built with the every-day PC users in mind.
STEP 1: Launch Wondershare Data Recovery App:
Normally, you would want to connect all removable device (you want to recover files from) to the computer before launching the Wondershare file recovery software.
Locate the app icon from your Mac active desktop and click on it to launch the program.
STEP 2: Select lost files recovery:
From here, you can easily select the lost files recovery option from the other options provided. This option helps you recover a wide range of data(s) including those deleted as a result of formatting your disk drive without doing a proper backup.
STEP 3: Pick the location of the lost files:
Here, you will be asked to specify the drive to search for the lost document or files. You are also given the option to select the type of files you would like to retrieve.
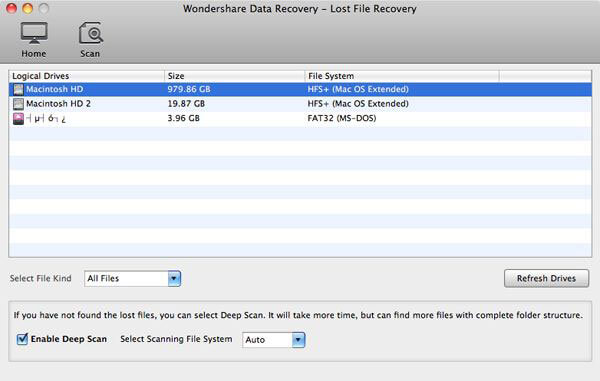
Remember to use the refresh drives option when attempting to recover from external storage drives you just connected to the computer.
Refer to the step 5 above to see if the deep scan option is going to be necessary, else, uncheck the box and hit the start scan button to begin.
STEP 4: Preview the founded files and select the ones you want to recover:
This is where you are given the privilege to preview the recovered files and see if the important ones have been found, then you choose to save only the important ones or all the recovered files.
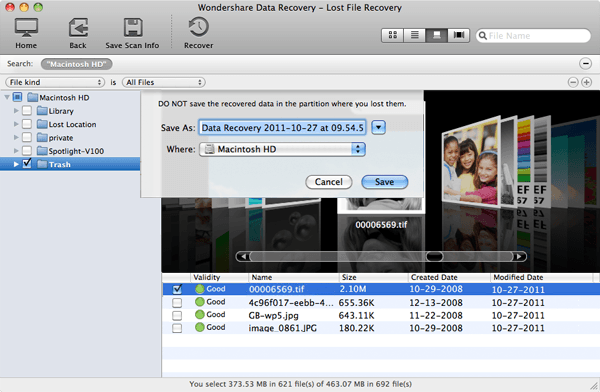
STEP 5: Tap “Recover” to get your deleted files back:
Here, you can save the desired files to your main computer drive or to an external storage device, avoid saving recovered files to the same storage media they were retrieved from.
Other Data Recovery Tools from Wondershare
There are other useful data recovery tools from wondershare Inc. such as Wondershare Dr.fone for Android, for iOS and Wondershare photo recovery software.
While the mobile data recovery apps works flawlessly for recovering lost documents, text messages, contacts, notes, whatsapp history and file types specific to mobile devices, the photo recovery app uses an improved file recovery technology to get back lost digital photo and media from camera and PDA(s).
So it doesn’t really matter where you are attempting to recover the lost data from, all you need do is follow our guide carefully to recover your lost files and documents.
Remember to drop us a note if there be any challenges regarding the data recovery methods in this guide or other ones you have tried in the past. Please do share this page with your friends that might need tips on how to recover deleted files from their Mac or Windows devices.






Time Machine would only help you in the future. Is your Mac set up with Time Machine? If so you should be able to get the deleted files that way. Click the Time Machine icon in the dock. Then go back to before you deleted the files, they are probably still available.
If you don’t have a Time Machine backup yet,
Maybe you can try uFlysoft Data Recovery for Mac, it can recover empty trash on Mac only in three steps:
Step 1. Launch the software to scan the device where your files deleted
Step 2: Preview the scan result files and make mark if it is the one you find
Step 3: Recover files