No one likes it when their PC is running very slow, or the processor heats up excessively. But somehow, these things happen, and they are typically caused due to too many processes running in the background. Windows OS is the most popular computer OS used by many of us; it is more intuitive and highly customizable.
Well, one of the processes that make your PC sluggish is WSAPPX. This background process utilizes more system resources; thus, causing your PC to run slowly. However, in today’s article, we’d explain how you can stop this background process from affecting your system’s process. But before then, what is WSAPPX?
What is WSAPPX?
WSAPPX is a Windows OS background process that actively runs on all Windows OS computers by default. Well, this process is quite important; it handles installation, uninstallation, and managing of apps through the Microsoft Store. This process is important for Microsoft Windows Store and Universal Windows Platform (UWP) to run smoothly.
It is only advisable to disable or stop this process after you must have updated or installed all the apps you need to get from the Microsoft Store. Disabling this process would free up more memory; thus, allowing your PC to run much better and faster than ever.
Why Should You Disable WSAPPX?
If you can’t find this process when you open your Windows Task Manager, then you need not worry. However, if you can find it, and discover that it is among the processes with high CPU and disk usage, then you need to disable it. Well, disabling this process won’t stop your PC from running, and it can speed up your system’s performance.
3 Ways to Fix WSAPPX High Disk and CPU Usage on PCs
These three methods are sure to help you fix WSSAPX’s high disk usage concerns. They are all safe practices that don’t require a high level of technical knowledge.
1. Disable Windows Store
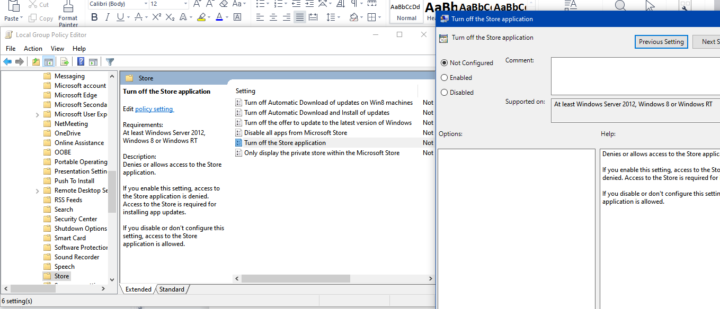
Since this process is majorly triggered by your activities on the Windows store, disabling the program would cause the background process to stop running. To disable Windows Store, follow the steps below.
- Press Windows key + R and enter this command into the “Run” box: gpedit.msc
- Hit the ENTER key on your keyboard, or click the “OK” button.
- Go to this directory: Local Computer Policy ==> Computer Configuration ==> Administrative Templates ==> Windows Components ==> Store
- Now, right-click on Turn off the Store application and select Edit from the context menu.
- Check “Enabled” and save changes.
2. Update Your PC Drivers
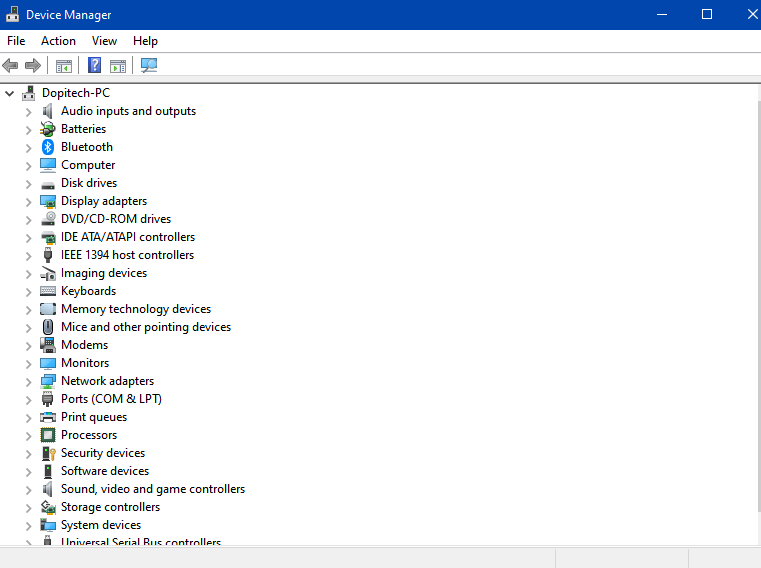
Your PC drivers are actually what powers your PC to function the way it does. If these drivers are well-outdated, they can cause so many unusual signs. So, when you notice that your WSAPPX is using too many resources, one of the things to do is to update your drivers. To do this, follow the steps below.
- Press Windows key + R and enter this command into the “Run” box: devmgmt.msc
- Hit the ENTER key on your keyboard, or click the “OK” button.
- Find outdated drivers and update them; you can start with your HDD drivers
Alternatively, you can use third-party software to find all outdated drivers on your PC and update them in one click.
3. Run the Check Disk Command

Windows OS comes with a built-in check disk utility that helps users to scan for bad sectors on their disk and fix them automatically. The reason for the high disk and CPU usage you’re experiencing could be due to bad sectors on your hard drive, so running the chkdsk command can fix the issue. Here’s how to do that, and you need to be an Admin user on the computer for this to work.
- Right-click on the Start icon and select “Command Prompt (Admin)” or “Powershell (Admin).”
- When the terminal opens, run this command: chkdsk.exe /f /r
- This command takes time to execute completely, wait until it completes, then reboot your PC.
What More?
These are the three best and safest ways to fix wsappx high disk and CPU usage on Windows computers. You may also consider increasing your physical/virtual memory to stop the high CPU usage.


