Inarguably, a lot of people use their mobile phone cameras to scan documents, thanks to mobile scanner applications that are compatible with mobile operating systems. But then, while smartphone cameras may be so good and offer stunning clarity, they cannot be used as a substitute for actual scanners, most especially in workspace environments.
CZUR ET24 Pro is a modern smart scanner that brings a lot of functions and innovative document-scanning technologies to the market. Think about a scanner that can correctly scan photos, magazines, and curved pages and convert the texts into readable formats like PDF, text, and other popular formats with great accuracy. Here is a detailed review of CZUR ET24 Pro scanner and how to use it.
CZUR ET24 Pro Overview
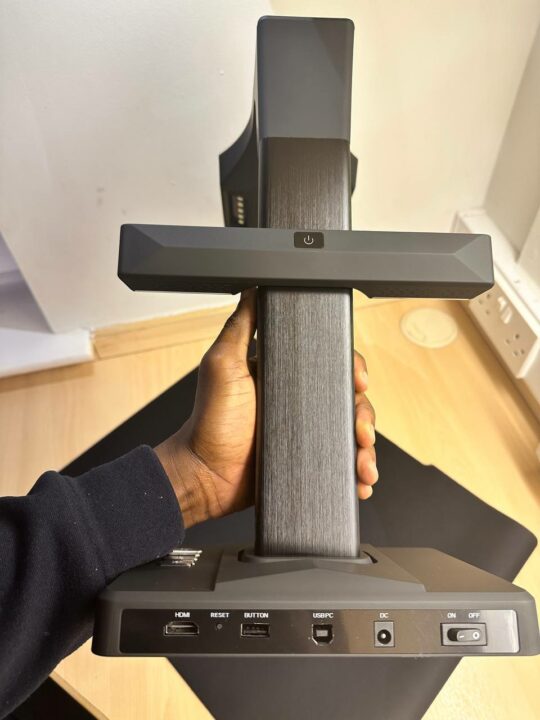
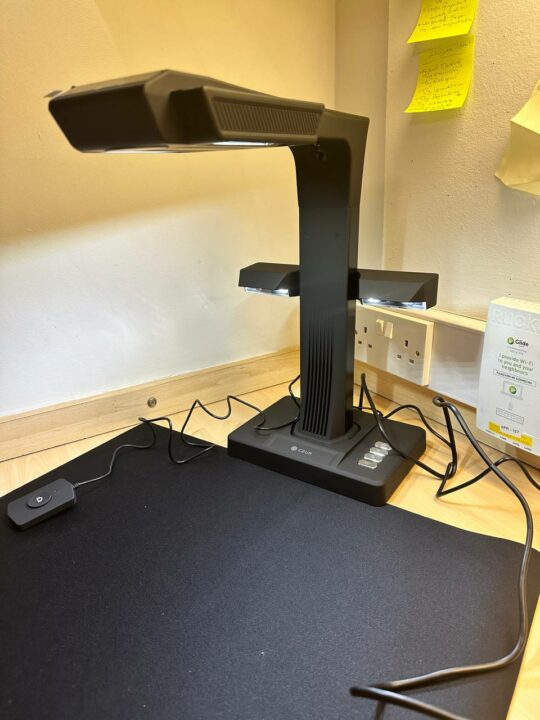
The ET24 Pro scanner from CZUR flaunts a sleek, appealing design that is space-saving and can easily fit on any desk. It is a modern scanner, and as such, you will expect it to come with a wealth of cutting-edge features – well, this scanner does come with many innovative features.
Using the ET24 Pro, which happens to be one of the brand’s most sophisticated models, you can scan glossy papers, thicker books, magazines, and photos. The scanner comes with a descriptive installation manual inside the box, main accessories and all that’s needed to set up the device.
Scanning through the scanner’s body, you’ll find a couple of connection ports, and they are all labeled for easy identification for the user. The CZUR ET24 Pro document scanner is capable of scanning one page in less than 2 seconds. It has a black (blank) document pad that is wide enough to accommodate any magazine, book, or document you need to scan.
In this year’s CZUR best Black Friday deals, you’ll be able to get a whopping 50% discount on this modern AI-powered smart scanner that lets you do more in less time than a traditional scanning machine.
Unboxing CZUR ET24 Pro AI-Powered Smart Scanner
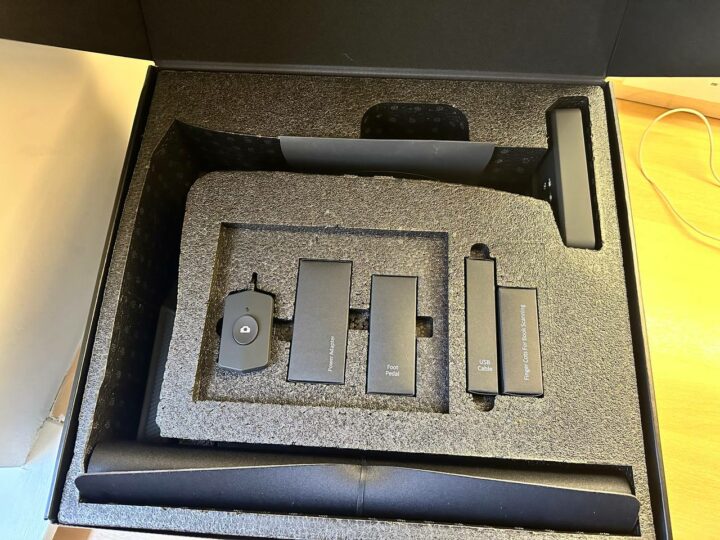
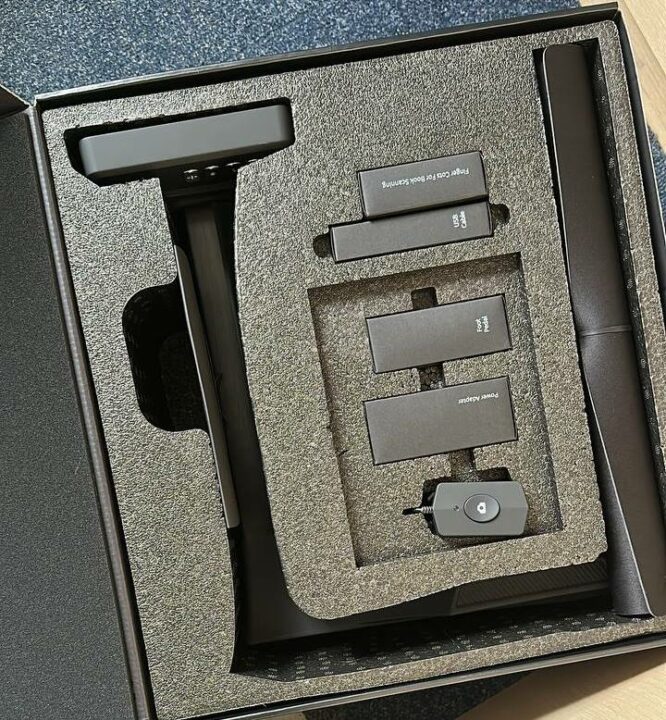
This cutting-edge smart scanner comes in a sizable box, containing the main device and all the accessories necessary for its setup and configuration. Inside the box lie the following items:
- The main unit (ET24 Pro Scanner)
- Widespread black pad for placing documents
- Hand button
- Foot pedal
- Power adapter
- 2x finger cots for book scanning
- CD Rom guide and installation manual
- USB cable
- Side light for scanning glossy papers
CZUR ET24 Pro Specifications
| Scanning Speed | ≈2.0s |
| Paper Size Support | A3 maximum |
| Scannable Documents | Glossy Paper, Thicker Books, Magazines, and Photos |
| Camera Pixels | 24mp sensor |
| Resolution | 5696*4272 pixels, 320DPI |
| Image Format | JPEG |
| Video Format | MJPG |
| Processor | 32 MIPS CPU/Dual core openrisc 32bit, 1GB DDR |
| File Export Format(s) | PDF/TIFF/WORD/EXCEL/Searchable PDF |
| OCR | Built-in ABBYY OCR |
| LCD | Supported |
| Operating System(s) | Windows (32 & 64 bits), macOS, and Linux |
| Brightness Level | 4 adjustable levels |
CZUR ET24 Pro Smart Scanner Features
1. 24MP Sensor and Side Lights
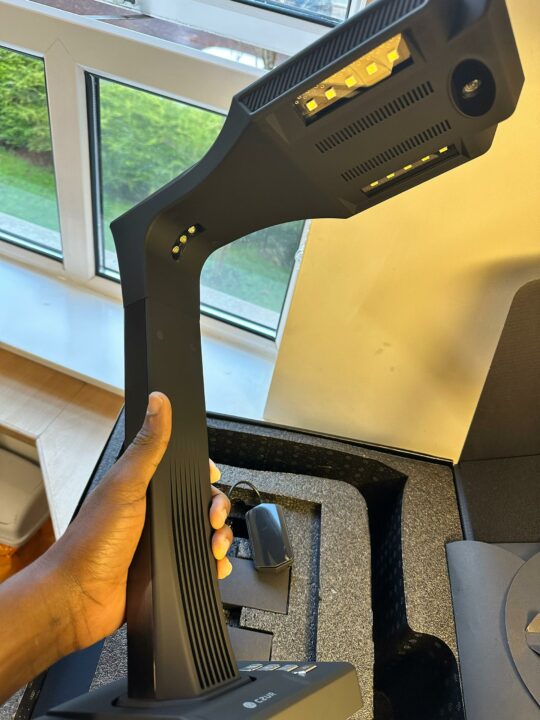
The ET24 Pro scanner is equipped with a 24MP sensor for optimal clarity when scanning any type of document. Also, the scanner includes “sidelights” (addon) to reduce reflections when you’re scanning a glossy paper. The sidelight clips onto the mainframe and has its own power button.
2. Multiple Connectivity
A look around the mainframe of the scanner and you’ll find an HDMI port, USB PC connector, the DC port for power, and a standard USB-A port. The ports are clearly labeled for easier identification.
3. Indicator Lights
CZUR ET24 Pro features a bank of LED indicators positioned strategically around the scanner’s mainframe. These lights come on and go off to indicate several actions. For example, if the video record indicator light at the front of the mainframe keeps blinking (green), it means the scanner is recording a scan, and if it stops, it means the record has been stopped.
Similarly, there are other LED indicators (including the ones on the hand button control unit) that inform you about different ongoing actions – the user manual explains the meaning of each indicator light available on this smart scanner.
4. Foot Pedal and Hand Button
These two accessories are crucial for using this cutting-edge scanner. The hand button and foot pedal perform similar actions – to allow you to launch a scan. However, the foot pedal is more needed when working in “Computer Mode.” Computer Mode is recommended when you’re scanning larger books or documents you need to edit further after scanning.
5. LCD Screen
At the top of the scanner mainframe lies an LCD screen that displays a variety of information, including telling you whether the book, paper, or document you’re about to scan is properly placed on the black pad. The LCD also shows if your scans are being uploaded to a connected computer or not.
6. Wide Black Pad
You need a place to place your documents and papers to scan them, typical of CZUR scanners, the ET24 Pro includes a “Black Pad” inside the box. This black pad is lightweight and measures about 530x401x2.0mm – wide enough to perfectly contain most scannable documents.
7. Laser Lights
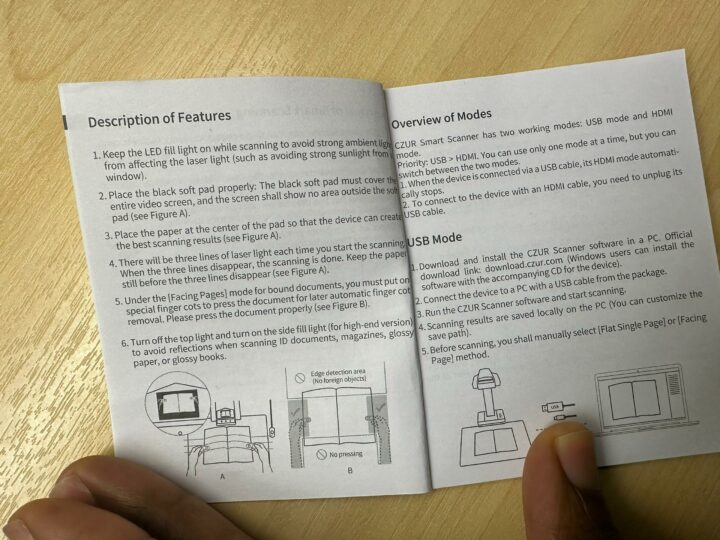
In addition to the LED lights on the head unit, this scanner also flaunts three (vertically arranged) laser lights on the “ankle” (in-between the main head unit and the upright frame you can hold on to). These lasers are for book scanning, they ensure that the “curved” parts of the book being scanned are read clearly for higher OCR accuracy.
8. Finger Cots
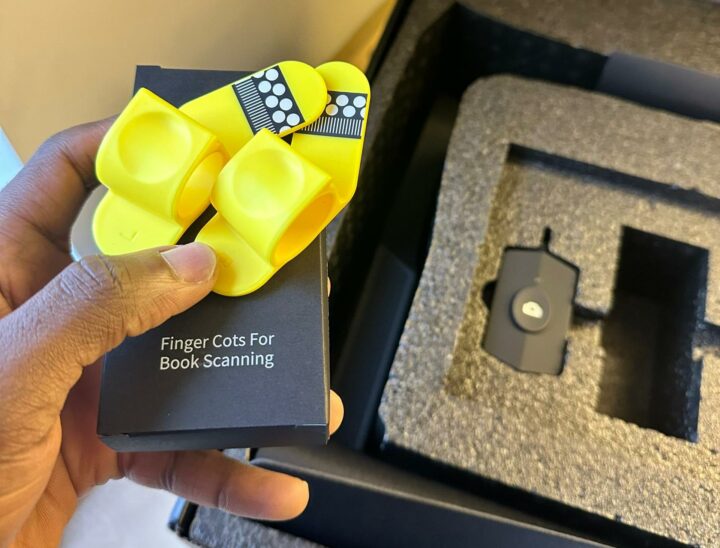
There are two finger cots in the box with the ET24 Pro scanner. You should wear these finger cots to hold down pages when scanning books or multi-page documents. The correct way to wear the finger coats is shown in the product’s user manual.
You should wear it on your index fingers and be careful not to cover any letter at the edge of the paper/book you’re holding down. These finger cots prevent fingerprint signals on the book or document you’re straightening out the pages, for more accurate scan results. The video below will come in handy for new users.
How to Use CZUR ET24 Pro
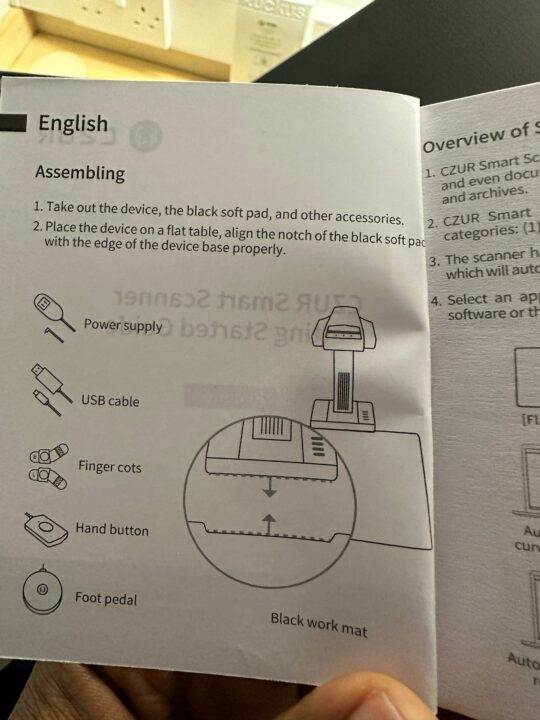
The ET24 Pro works perfectly for scanning various document types, and it delivers satiable results. To use this scanner efficiently, you’d need to install its software on your computer system; interestingly, the software is compatible with Windows, Linux, and macOS systems.
To download the software, visit the ET24 Pro page and download the version that’s most suitable for you. You can also use the CD that’s shipped with the product or follow the guide in the user manual.
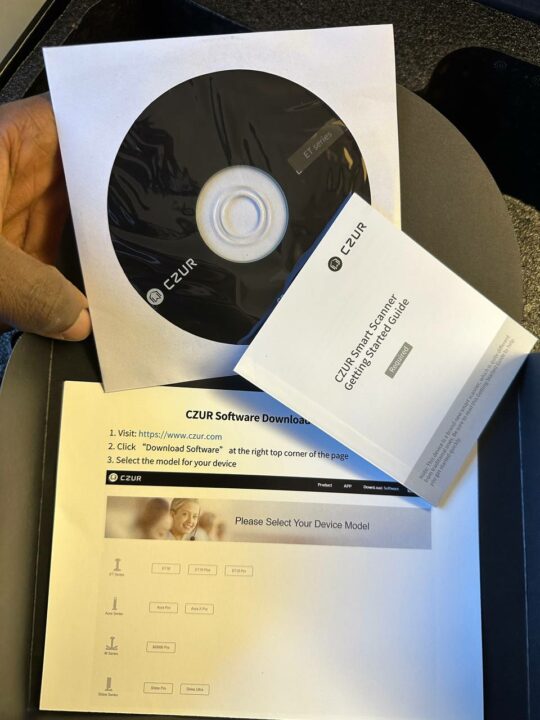
During the software installation steps, you will be required to enter your scanner’s Serial Number – this number is found underneath the base. Enter it correctly to finish the installation procedure. After this, you can proceed to use the scanner.
Pre-Requisites
Firstly, you’d need to unbox the scanner and set up the base, light, and fittings. Properly install the “accessories,” including the sidelights and hand cots (if necessary). The mainframe should strategically be in contact with the black document pad, there’s a small cut-out on the document pad where the scanner’s mainframe should be placed.
Check the LCD at the top to ensure the black pad covers the entire screen and that the actual desk surface where the scanner is placed is not showing. Once this initial setup is done, proceed to connect the “Hand Button” or “Foot Pedal,” depending on what type of scan you want to run.
Don’t keep the finger cots far away – as they’ll be needed when scanning a multi-page document or book. Connect your PC using the provided USB cable: If you’re scanning to present the document to a projector, don’t connect to a computer, instead, connect it to a projector via the HDMI port.
1. Scanning Single Document Sheets
Recommended Scanning Accessory to Use: Hand Button
It’s pretty simple, plug in the power adapter and turn on the scanner using the switch at the rear of the base unit. Place your document on the black document pad and watch the LCD on the head unit to ensure your document is well placed on the pad. If you are connected to the PC, use the monitor to watch the document’s placement and choose a scan mode.
If the main light from the scanner seems to be too high and reflective on the document you want to scan, adjust the brightness using the “brightness level” adjustment button on the base unit. Alternatively, you can turn off the main light and use the side lights, which is best for scanning reflective documents.
With the document placed correctly on the black pad and the lights are lit, you can then scan your document sheets; all you need to do is press the “Capture” button on the “Hand Button” and your document gets scanned. You can scan many sheets in two minutes; this scanner scans a single page in less than 2 seconds.
2. Scanning Books or Multi-Page Documents
Recommended Scanning Accessory to Use: Foot Pedal and Finger Coats
Connect the foot pedal – it is much easier to use the foot pedal for multi-page documents. Place the book or document on the black pad and choose your scanning mode. Ensure to wear the finger cots, that’s what you should use to straighten out the document pages to avoid littering your fingerprints on them, which may affect the scan accuracy.
When you use the finger cots, ensure that the stripped part appears on the LCD as you’re holding down the book pages. If the scanner detects the “stripped” part of the finger cots, it’ll delete it entirely and the finger cots won’t show in your scan. But if you only let the plain yellow part show on the LCD, then the scanner will capture it into the scan as part of the book page.
Use the foot pedal to scan each page you turn to; just press it down using your feet and it captures. Editing tools are available on the software; you can crop, copy words, and perform other actions from your PC.
Editing Your Scans
There are many editing options available on the software, which is why you should install it on your PC. After your scans, access them from the software, and this is where it gets personal. Do you want to change anything in the document? Do you want it in another format? Or maybe you want to change the file size? Well, there are many actions you can access from the software’s interface after recording your scans.
Our CZUR ET24 Pro Review and Verdict
The 30-second video above was recorded with the CZUR ET24 Pro AI Scanner. It is one of the several functions we did try out with the device before creating this detailed review. It worked as advertised and ticked all the necessary boxes for us.
The CZUR ET24 Pro scanner is modern and one everyone who loves modern techs should consider getting. It is a move away from traditional scanners such as HP Deskjet, Cannon Box scanners, etc.
The scanner is, first of all, sleek and fits into the work desk/environment perfectly, thanks to the design. Unboxing and setting it up wasn’t much of a problem as the instructions in the manual were intuitive and easy to follow. About the scans, it delivers perfect results and offers a decent number of flexibility. With this scanner, you don’t have to cut your books into two just to scan them perfectly.
Using the finger cots is a bit tricky, you have to let the scanner see the stripped part, and at the same time, you must ensure you’re not using the coats to cover any word on the page.
Overall, the ET24 Pro is fast and has the ability to immensely increase your productivity. It’s flawless with scanning pages, the lights are adjustable and the side lights come in handy when the main lights seem to be too high for your needs. All the connection ports on the base unit are useful depending on what exactly you want to do.
What More?

The ET24 Pro is an AI-powered smart scanner and as such, costlier than most traditional scanners of its size. It delivers outstanding scan results -as it captures diagrams and formulas perfectly. Also, the scanning speed is one to be happy about, plus, there are multiple features on the PC software.











This is a great review of the CZUR ET24 Pro! I’m particularly interested in its ability to scan books without damaging the spine. However, I do a lot of scanning with thick textbooks and journals. Does the scanner have any limitations on the thickness of documents it can handle?
Your personal touch in the review, sharing how it fits into your workflow, added a layer of authenticity that’s often missing in tech reviews. It’s like getting advice from a friend who genuinely knows their stuff. The comparison with other scanners in the market was super helpful, too – makes it easier for a tech novice like me to navigate the options.